I love the look of a diamond tufted headboard.

It looks so rich and glamourous. Diamond tufting is unique as the tufts are deep, creating beautiful pleats giving upholstery a luxurious finish. Wanting to create that glamourous look for my daughter's room on a frugal budget, I was up for the challenge to make one myself.
The drawback was that in the spring when I first started researching in how to make one I could only find one tutorial, via Apartment Therapy. Since then another great tutorial has shown up, from Addicted 2 Decorating.
Now you can add mine to the list!

This headboard has been 5 months in the making, I am very good at procrastinating and was very hesitant in using the jigsaw. I am proud to say that I can now operate a jigsaw and have managed to keep all my fingers! If you want to see the reveal you can check it out here.
Warning: This project is not for the DIY challenged or for those how lack patience. It took me several hours over the course of a few days to make this.
You might need a strongdrink, er, coffee to help you along the way.
You might need a strong
Supplies Needed:
*plywood or MDF (about 1/2" thick)
*foam, either 2" or 3" thick, large enough to cover the wood
*hi-loft batting, , cut at least 12" larger than the wood, on all sides
*fabric, cut at least 12" larger than the wood, on all sides
*spray adhesive
*self-covering buttons, how ever many you decided to use
*upholstery thread or nylon cording
*long upholstery needle
*jigsaw
*drill with drill bit (I used a 3/8" bit)
*Sharpie
*staple gun and staples
*hammer
*meter (yard) stick
*right angle ruler
*French curve (to shape a curved headboard)
Before I go into the nitty gritty details, let me share with you a few tips I learned along the way.
#1: A curved shaped headboard is a lot harder to diamond tuft. Much easier if you use a shape with right angles, because you end up pleating along the edge and a straight edge is easier to pleat than a curved one.
#2: Use a thin sheet of plywood, 1/2" thick. I used a 3/4" thick plywood because it was laying around in the garage, but found it was harder to cut and made the headboard a lot heavier.
#3: Measure your button holes before you buy upholstery thread. I bought the thread without looking at the size of my button hole and had to run out and by thinner thread.
#4: Use upholstery thread. Don't try embroidery thread, nylon fishing type thread, etc., they will break. You need upholstery thread that won't break when you pull it taught. This will save you a lot of heartache (and tears).
#5: Use an upholstery weight fabric. By that I mean you don't want to use a fabric that has stretch or is too thin. If it's too thin it will rip and if it's stretchy you won't get a nice smooth finish. I used a faux silk fabric (made with polyester) and found it a bit challenging, I had to be careful so it wouldn't tear. A heavier weighted fabric (ie. cotton twill) would be much easier to work with.
#6: Use at least a 2" thick foam. I used a 3" thick foam as I wanted a really rich tufted look.
How-to:
Start by deciding what shape and size of headboard you would like. There is a lot of inspiration on the web. Make sure the headboard is slightly wider than the bed, the foam, batting and fabric will add to that width as well.
I laid out the design on the wall using painting tape to get an idea of the shape and height of the headboard.
Next draw out your design on a large piece of paper. This will be your pattern.
I used ugly gift wrap I had laying around. Make sure to measure twice!


I used ugly gift wrap I had laying around. Make sure to measure twice!


Lay your pattern on the wall and secure it with some painters tape to double check your design against the bed. You want to be sure you are pleased with the shape and placement on the wall before you cut your wood and upholster. Make any adjustments.
Using a ruler and a right corner ruler I planned out where I wanted the buttons to be. The more buttons you have the more tufting there is involved.
Lay your pattern on the sheet of wood, taping it down at various places. Using a sharpie trace out your pattern on the wood, button holes as well. After you have traced, re-measure making sure your measurements all line up. (Measure twice, cut once - can't stress that enough!)

Lay the sheet of wood on a work surface where you can cut freely. I am not fortunate to have a cutting table so I placed the sheet of plywood across two chairs.

Taking a jigsaw and wearing safety glasses (safety first!) slowly cut out the headboard. This is where a thinner sheet of plywood would of been nice, easier to cut through!


Using a drill, drill holes where the buttons will be placed. You don't want a huge hole, just enough so the thread can get through with ease.


For this step you will want to be in a well-ventilated room or outside.

Using a spray adhesive, spray the entire surface of your wood. This is really important as you don't want the foam shifting around as you tuft.


(I used camping foam - much cheaper than ordering it from a fabric or upholstery shop)


Lay down the foam onto the board, making sure it sticks. You can use large pieces of foam fit together, it doesn't have to be one large piece.


Using an exacto knife, sharp scissors or an electric carving knife; cut out the foam using the edges of your headboard as a guide. It doesn't have to be neat as you will be laying batting over top to soften the edges and give your headboard a nice smooth look.


(This is where I did it backwards, I traced and cut the foam first and then stuck it to the board but somehow the foam ended up being smaller and I had to add bits to fill it in)
Next you will need to cut out the button placement holes in the foam. This is where ordinary tufting is different from diamond tufting. You need a hole slightly bigger than your button, as your button will fall into the hole with the fabric and create the pleat that is unique to diamond tufting.
I used a bamboo skewer to push from the back into the front of the foam to mark the placement of the buttons.


Double-check the placement of your buttons making sure they line up, using a ruler.


The next step is to cut out the holes, cutting a hole slightly bigger than your buttons. I used an exacto knife and scissors to cut out the hole, but you could use copper piping that is hack-sawed off to give a sharp cutting edge. This part was time consuming as I wanted to shape the hole as carefully as I could. If it isn't a perfect circle it doesn't matter, it will get "filled" in with fabric and batting.


Once the foam is shaped and button holes cut out, lay your batting over the top. You will want to use a hi-loft batting (a nice thick one, or you could double up) that is cut at least 12" bigger all around than your headboard. This is important as you will use up batting and fabric while tufting and will want to be left with some on the edges to wrap under.

Lay your piece of fabric over the batting, centering the fabric so that there is overhang on all sides. The fabric and batting lay loose over the headboard. You staple the edges after tufting, another characteristic in diamond tufting. Tip: Make sure the fabric is ironed to ensure a smooth polished look.

Now the fun begins!
Using a self-covering button kit, make covered buttons following the directions on the package.


Thread the first button.
{I doubled up the thread and tied a knot at the base of the button}


Starting on the button placement in the middle of the headboard, thread the button through headboard starting from the front pulling the threads through to the back.
You start in the middle working your way to the edges.
Guide the button deep into the hole with your fingers while pulling the thread taut in the back. This is where being an octopus would come in handy:)


While pulling the threads as taut as you can, staple the thread to the back, then change the direction of the thread, staple again. Keep going until you have a zig zag pattern. This ensures that the thread won't slip out and loosen.
{I hammered the staples in as sometimes the staple gun didn't shoot the staples into the wood very well}
{I hammered the staples in as sometimes the staple gun didn't shoot the staples into the wood very well}

Next you will work horizontally. After you are finished the first row, the next row to tuft will be the one parallel and vertical to the row you just finished. After tufting with each button, smooth and arrange the fabric, being careful not to pull the fabric too tight. You need it loose in order to create the pleats once you work on the diagonal holes. Do the diagonal button holes last.
{I worked vertically as I chose not to have many buttons - you want to work on parallel rows first, then diagonal last}
{I worked vertically as I chose not to have many buttons - you want to work on parallel rows first, then diagonal last}

Finally tuft the diagonal holes.
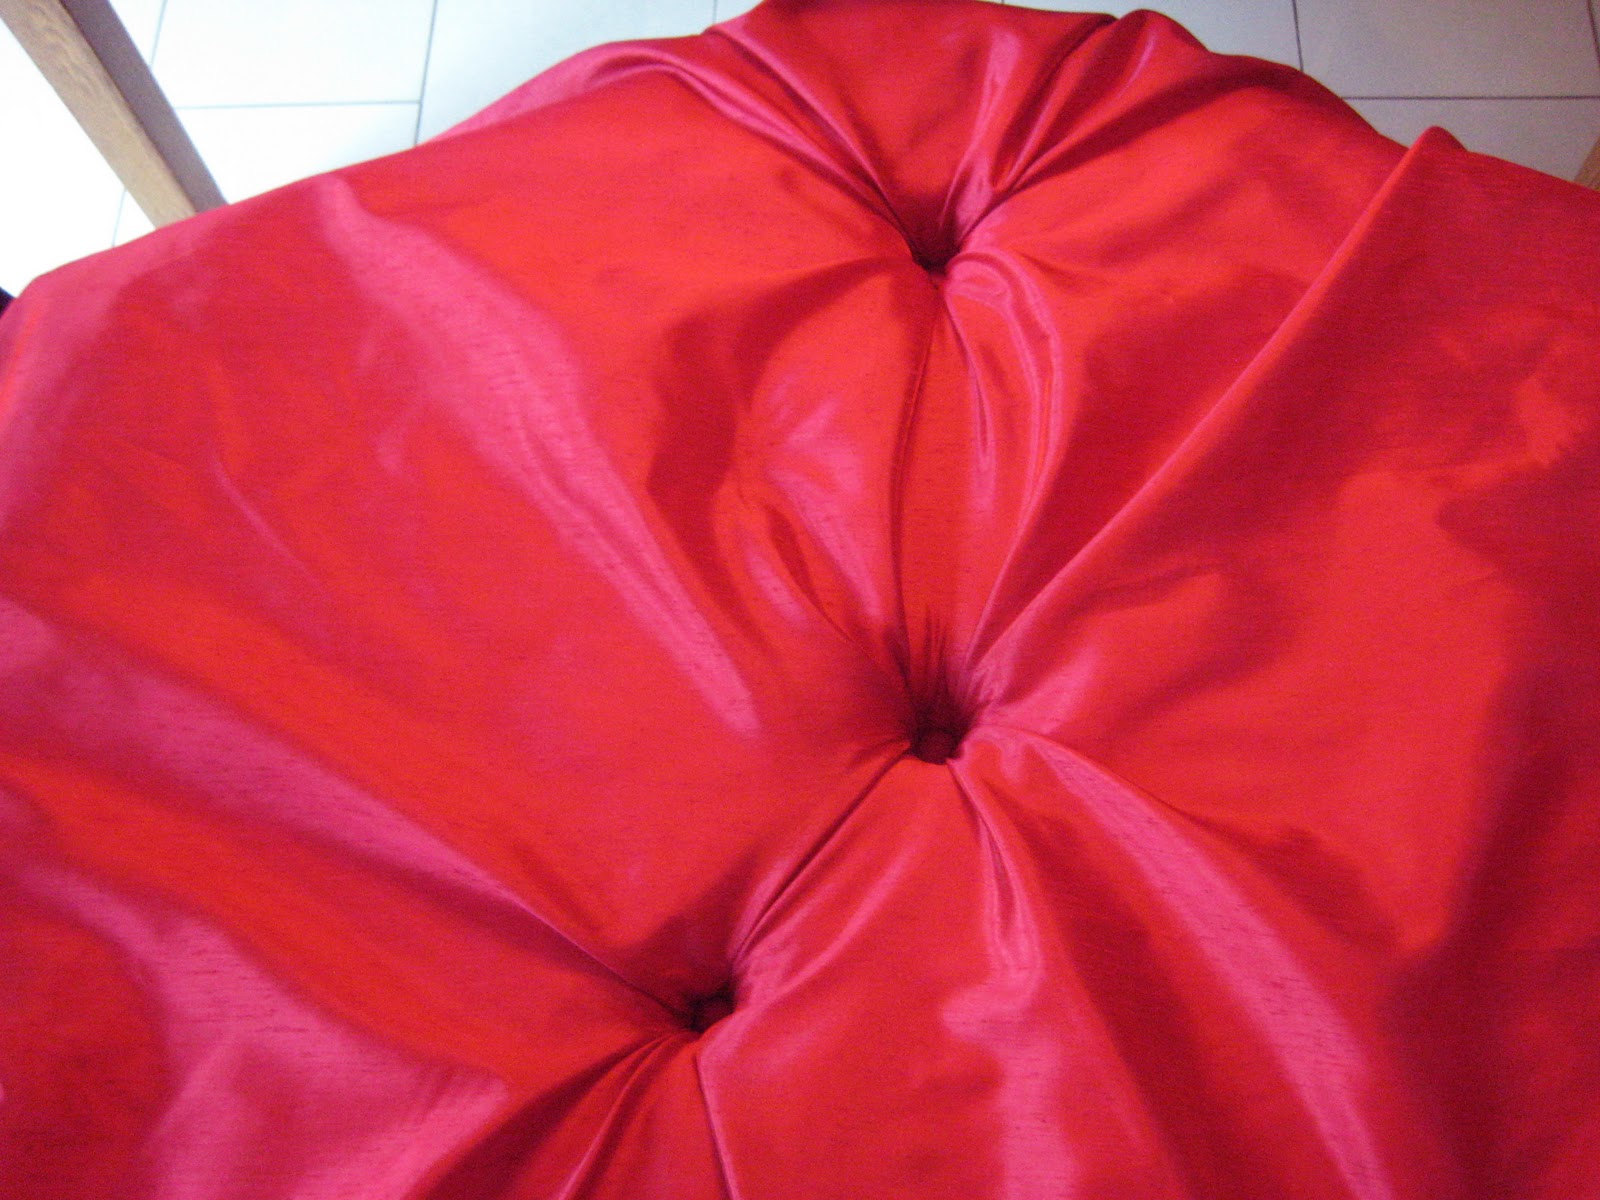

This is when you notice the pleats forming. Decide on the direction you want your pleats to lay.

Using your fingers, manipulate the fabric to form pleats.
Once all the buttons are in and stapled securely in the back, you are ready to staple the edges. Turning the headboard over begin staples the sides, pulling the fabric tight to create a smooth finish in the front.


This will be easier if you use a rectangular shape than a curved headboard. It took some manipulating the fabric around the curves to make the front side look smooth. You will find that there is "extra" fabric that you will simply fold and create a pleat at the edge. I re-did this step many times as I was unsatisfied with the way the fabric looked in the front. A flat screwdriver came in handy to pop put the staples when I decided to fix an edge. This is the part when patience comes in handy (along with a strongdrink coffee)


This will be easier if you use a rectangular shape than a curved headboard. It took some manipulating the fabric around the curves to make the front side look smooth. You will find that there is "extra" fabric that you will simply fold and create a pleat at the edge. I re-did this step many times as I was unsatisfied with the way the fabric looked in the front. A flat screwdriver came in handy to pop put the staples when I decided to fix an edge. This is the part when patience comes in handy (along with a strong
At the corners I created a tidy fold and stapled down, trimming fabric in order to do so.


When finished turn it around and enjoy your hard work!

When hanging up the headboard I used D hooks screwed into the back of the wood to hang it to the wall. Using a stud finder I located the studs in the wall and placed the hooks to line up with the studs so that the headboard was secure to the wall. The headboard will be heavy.
Alternately, you can attach "legs" to the headboard and screw the "legs" to the boxspring bed frame if you are using one.
Alternately, you can attach "legs" to the headboard and screw the "legs" to the boxspring bed frame if you are using one.
Phew! Now I am making another headboard for the other daughter, this time using a heavy weight cotton fabric.

No comments:
Post a Comment