Showing posts with label how-to. Show all posts

Friday, September 2, 2011

How to Sew a Pillow with an Invisible Zipper


It is the moment that you have waited for with bated breath, learning how to sew a pillow with an invisible zipper!


Once you have made one, you will realize how easy it really is, except if you add cording. Adding cording will add a bit more work, maybe another time I can show you how.

But today it's all about the invisible zipper. 


Adding one just gives your pillow that professionally made look. Your friends will come over and ask,"Where did you get that pillow?" {thinking you bought it at some high end store] and you can just shrug your shoulders and casually say, "I made it."

You will be the envy of all.....


Materials Needed:

Fabric {upholstery weight, heavy cotton is best}
Invisible zipper {either the same length as your pillow or longer, you can always cut it}
Thread
Pillow insert
Zipper foot attachment {this is important to have so you can sew a straight seam close to the zipper teeth}

How-to:

1. Measure your pillow and add 1" to the width and length of your pillow. Cut out two squares {rectangles} using that measurement.


2. Unzip your invisible zipper.


3. Pin one side of the side {face down} along the bottom edge of one of the pillow pieces. You want to start pinning it about 2 inches from the edge.

{Why the  bottom edge? Because if your pattern has direction, then you don't want your zipper on top, but on the bottom of your pillow}


The other end, also about two inches from the end. You will sew your seam at the end, up to where the mark is on the zipper.


4. Baste the zipper. I wouldn't skip this step as it is hard to sew over the pins with a zipper foot. Basting ensures that the zipper will stay in place.


5. Use a zipper foot to sew on your zipper. This is what one looks like.


6. Sew along as close to the edge of the teeth of the zipper. When finished zip up the zipper in order to pin to the second piece of fabric.


7. Lay the second pillow piece on the first piece, right sides together, lining up edges.


8. With all the edges lined up, and without shifting the top piece of fabric, start pinning the other side of the zipper to the top piece of fabric.


9. Once you have pinned in a few pins, start unzipping the zipper to make it easier to pin it to the second edge.


10. Baste and sew the zipper close to the edge of the teeth of the zipper.


11. Zip up the zipper. You will notice that the zipper makes one "seam". Pin all the other edges and sew all around starting 2 inches in from the bottom edge to the other side.  Stitch close to the zipper seam but just below it being careful not to sew over your zipper. See photos.


12. Clip corners. This will help with crisp corners once this pillow is turned right side out. Zig zag the edges to prevent fraying.


13. Turn right side out {unzip zipper to do so} press with an iron and insert pillow!


There you have it, sewing a pillow with an invisible zipper.

You did it! Pat yourself on the back.

 It might sound tricky at first, but once you try it, the next pillow will be much easier! 

If you have any questions, please send me an email, I would love to help!

barbaras{dot}hodgepodge{at}yahoo{dot}ca


What are your plans for the weekend?

I am just finishing up re-finishing my fabulous dresser find!

XO Barbara

Wednesday, August 31, 2011

How To Make a Pillow : Envelope Back Enclosure


Welcome to my first of two pillow tutorials! I first shared this one a few weeks back at The Crafty Bee, a sweet blog written by an equally sweet gal from Montreal!

Accent pillows are the greatest way to add colour, texture and inject some trendiness into your home.
And they don't cost a lot to make, usually one pillow requires about 1/2 yard of fabric. So to splurge on a  some high end fabric for one pillow can be feasible!


I had a fabulous high school sewing teacher who taught me all I know. I always say to anyone who is discouraged and intimidating by sewing, "If you can sew a straight line, you can sew." All it takes is patience, time and a good iron. Why a good iron? Using an iron throughout makes your project look crisp and professional.

Now onto sewing a pillow....

The key to a good pillow is to pick the right fabric. Make sure you use a good upholstery weight fabric or heavy cotton. This will ensure a nice crisp pillow.

Materials needed:

Fabric
Coordinating thread
Buttons
Pillow insert {I like to use down, the best deal in town is Ikea - $6!}
Sewing machine
Iron

How-to:

1. Measure your pillow insert. For front side of the pillow add 1" to both sides. This will allow for a half inch seam allowance. For the back side you will cut two pieces that will create the envelope back enclosure. For the width, add 1". For the height, add 4". 


2. You will now iron and sew a hem on the wide edge of the two pieces. Fold over 1/2", then another 1" to create a hem,  this will be where they overlap to create an opening.


3. Overlap and pin the two hemmed edges as shown in picture.


4. You can either stitch the edges of the enclosure to create an opening OR if you want the Sarah Richardson look you can sew buttons and buttonholes to keep the enclosures closed.


5. Buttons and buttonhole option:

Measure where you want your buttons to lay. I used three buttons. A rule I learned in my short stint at fashion design school was odd numbers look best to the eye.


6. Sew the buttonholes, on one piece along the hemmed edge. Snip open.


7. Sew buttons on other hemmed edge, lining up with the buttonholes.


8. Mark and stitch the opening of the back.


9. Lay the front and back pieces, right sides together, matching corners. Pin and stitch along all four sides. I then trim the corners and zigzag the edges of the seams.


10. Turn right side out and iron to give a nice crisp edge.


11. Insert pillow and then voila!


Hope you will try to make one for yourself!

On Friday I will show you how to make a pillow with an invisible zipper!


If you have any questions about this tutorial, feel free to email me:
barbaras{dot}hodgepodge{at}yahoo{dot}ca

XO Barbara

Thursday, August 18, 2011

Guest Posting at The Crafty Bee


Today you can find me sharing a never-before-been-published pillow tutorial at The Crafty Bee.


You might remember The Crafty Bee generously offered up two of her subway prints for a giveaway! Beatrice is a relatively new blogger who is such a sweetheart and talented! She is always creating amazing things for her home.

Check out her Colette bed knock-off:


Most recently she acquired a sewing machine, so I shared my how-to's with her!

Head over if you want to learn how to make an envelope back enclosed pillow.


Next week I will show you how to sew a pillow with an invisible zipper.

XO Barbara


Monday, July 25, 2011

How-to Recover a Bulletin Board


Recovering a bulletin board is easy-peasy.


 My son's bulletin board has been recovered for the 3rd time. The first time, well, not so pretty. The 2nd time, with the ill-fated burlap. Now with chic black and white stripes, my favourite colour combo {I guess they aren't considered colours, but for simplicity I will call them colours}


What you  need for this project is:

  • A bulletin board, preferably one with a frame
  • Fabric
  • Staple gun
  • Upholstery tacks
  • Hanging brackets


1. Measure your bulletin board {this one has been re-covered a few times, doesn't look pretty}


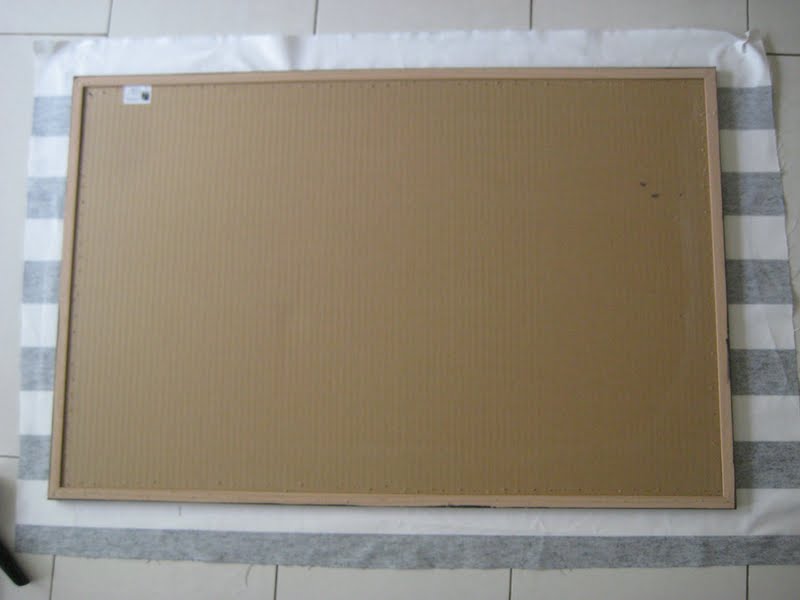
2. Cut out desired fabric 3" larger than the board, on all sides.


3. Lay the front side of the board on fabric. Make sure it is centred.


4. Staple one side.


5. Staple opposite sides, then top and bottom. Making sure fabric is lined up and taut, leaving corners free.


6.  Fold in corner {see photo} and staple.


7. Fold over each side, like you are wrapping a present. Staple.


8. Using the frame of the board as a guide, push upholstery tacks along the edge, making sure they are evenly space.


8. Hang up using desired hanging brackets.


Easy-peasy.

XO Barbara